 Save
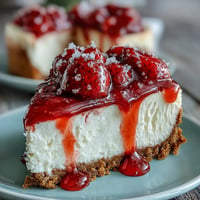
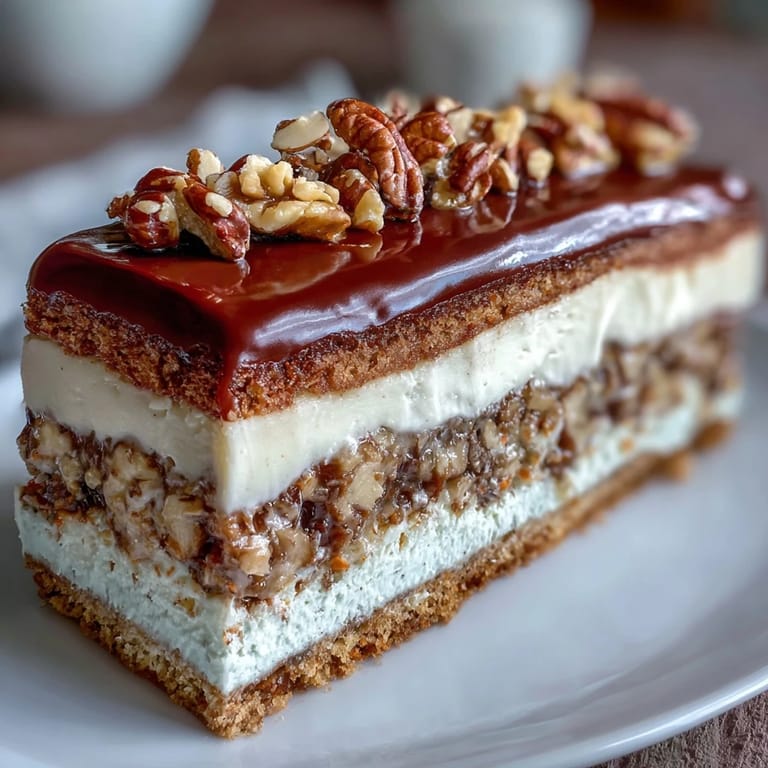
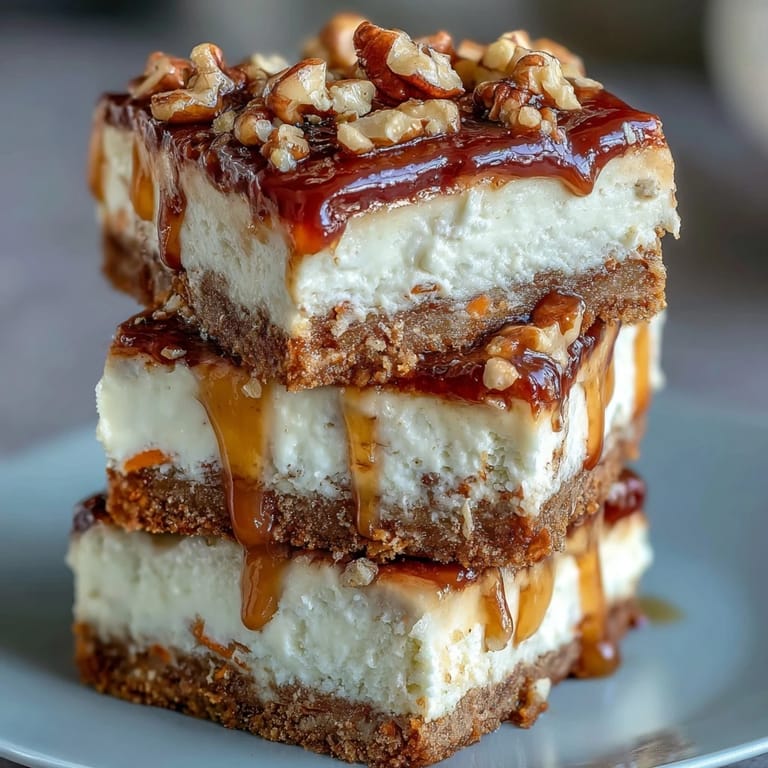
Save My sister called me in a panic the week before Easter, asking if I could bring something that wasn't the same old bunny cake everyone expects. I found myself standing in my kitchen at 10 PM, staring at a half-empty carrot in my crisper drawer and thinking about cheesecake—two things that shouldn't work together but somehow felt inevitable. Three hours later, I'd created these bars, and watching her face when she bit into that swirl of spiced cake, creamy center, and frosting made me realize I'd accidentally stumbled onto something special.
I made these for a spring potluck last year, and a neighbor I'd never really spoken to came back for thirds, then asked for the recipe. We ended up talking for twenty minutes about baking disasters and secret ingredients, and she told me her grandmother used to make something similar in the 1970s. That's when I realized these bars carry that kind of comfort—they bridge generations and create moments that feel bigger than dessert.
Ingredients
- All-purpose flour: This is your structure, so make sure you're not packing it into the measuring cup—spoon it in gently and level it off, or you'll end up with a dense, sad bar.
- Baking powder and baking soda: These two are doing the heavy lifting to make your carrot layer light and tender, so don't skip checking their expiration dates.
- Cinnamon and ginger: The soul of this recipe, and honestly, if your spices smell dull and stale, it's time to replace them because they make or break the flavor.
- Granulated and brown sugar: The combination gives you both sweetness and depth, with brown sugar bringing a subtle molasses note that feels almost savory against the cream cheese.
- Eggs: Room temperature eggs blend more smoothly into the batter, so pull them out of the fridge while you're gathering other ingredients.
- Vegetable oil: This keeps the carrot cake layer moist and tender—butter would make it too cakey, which defeats the purpose here.
- Grated carrots: Use a box grater or food processor, and don't wring them out; the moisture is your friend and helps keep everything delicate.
- Walnuts or pecans: Optional, but they add a subtle bitterness that balances the sweetness and gives you something to bite into.
- Cream cheese: This needs to be soft enough to blend without lumps, so set it out for at least 30 minutes before you start mixing.
- Powdered sugar for frosting: Sift it first if it's lumpy, or you'll spend ten minutes wondering why your frosting looks grainy.
Tired of Takeout? 🥡
Get 10 meals you can make faster than delivery arrives. Seriously.
One email. No spam. Unsubscribe anytime.
Instructions
- Set up your stage:
- Preheat the oven to 350°F and line your 8-inch square pan with parchment paper, leaving some overhang so you can lift the whole thing out later without wrestling with hot bars. This step takes two minutes and saves you immense frustration.
- Build your dry team:
- In a medium bowl, whisk together the flour, baking powder, baking soda, cinnamon, ginger, and salt—this ensures the leavening agents are evenly distributed and your spices aren't clumpy. The whisking motion also aerates the flour, which gives you a lighter crumb.
- Create the carrot cake base:
- In a large bowl, whisk the granulated sugar, brown sugar, eggs, oil, and vanilla until it's smooth and slightly pale, which takes about two minutes of steady whisking. This is emulsifying the oil and sugar together, creating the foundation for a tender cake.
- Bring it together gently:
- Stir in the grated carrots and nuts, then fold in the flour mixture slowly—folding, not stirring, because you want to keep all that air you just incorporated. It should come together in about 15 seconds of gentle folding.
- Layer your first foundation:
- Spread 2/3 of the carrot cake batter evenly across the prepared pan—use a spatula and take a breath, because this doesn't need to be perfect. You're leaving room for the cheesecake layer and the marbled top.
- Make the cheesecake magic:
- Beat the softened cream cheese and sugar together until there are absolutely no lumps—this takes about two minutes with an electric mixer. Add the egg and vanilla, mixing until it's completely smooth and homogeneous.
- Layer two is where the surprise lives:
- Pour the cheesecake mixture over the carrot cake layer and spread it gently into an even layer, working from the center outward. Don't stress if it's not perfectly level; the oven will help even things out.
- Create the marbled moment:
- Dollop the remaining carrot cake batter over the cheesecake in random spoonful-sized pieces, then take a knife and swirl it gently through all the layers two or three times. You're not trying to fully blend everything—just creating visual movement and flavor surprise in each bite.
- The bake:
- Slide it into the oven for 40 to 45 minutes, watching for the moment when the center barely jiggles when you shake the pan—a toothpick should come out with just a few moist crumbs clinging to it. Don't overbake, because the cheesecake will continue to set as it cools.
- Patience is its own reward:
- Let the whole pan cool completely at room temperature, then refrigerate for at least a couple of hours before frosting—this makes slicing clean and possible. Cold bars also hold their shape better and taste more integrated.
- Frosting finishes everything:
- Beat the softened cream cheese and butter until they're fluffy and pale, then gradually add powdered sugar while mixing on low speed to avoid a powdered sugar explosion in your kitchen. Add milk one teaspoon at a time until it spreads easily without falling apart.
- The final layer:
- Spread the frosting evenly over the cooled bars, then chill for at least an hour so the frosting firms up and makes slicing clean. Use a sharp knife dipped in hot water (and wiped dry) between cuts for the prettiest presentation.
 Save
Save I brought these to my book club one evening, and halfway through the meeting, someone asked if we could just abandon the discussion and talk about the bars instead. We spent the rest of the night debating whether the carrot cake part or the cheesecake part was the hero, and honestly, I loved that no one could agree—it means everyone found something different to love.
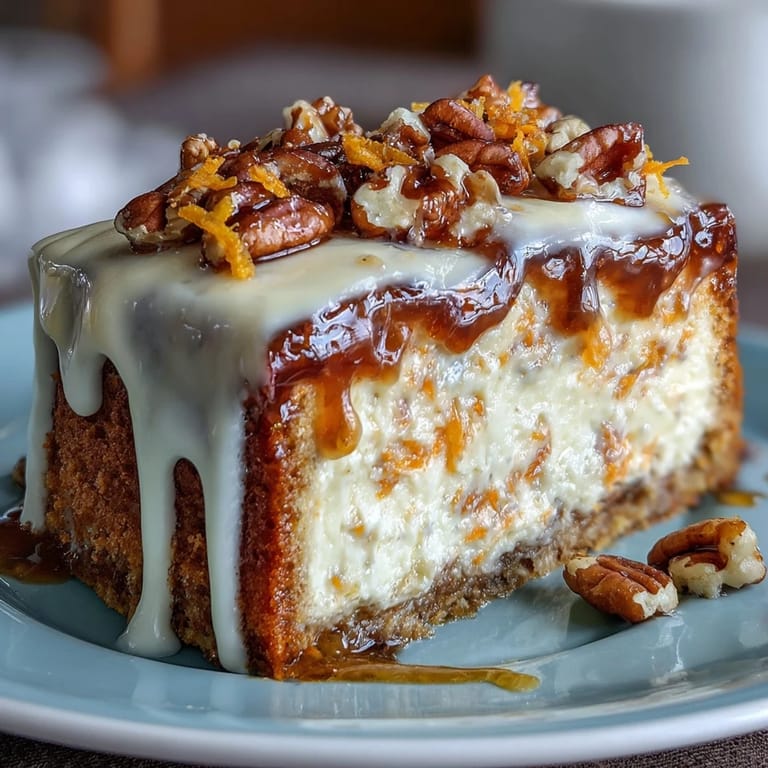
The Swirl Technique That Actually Works
The marbling is where magic happens, but it's also where I made my first mistake by over-swirling like I was trying to create a Jackson Pollock painting. What I learned is that restraint is the secret: three gentle knife strokes through the layers creates pockets of flavor surprise without fully blending everything into a homogeneous brown mess. Think of it like you're opening windows into different flavor territories rather than creating chaos.
Why These Bars Travel Better Than You'd Expect
Because they're in a pan rather than a traditional layer cake, they're structurally forgiving and don't require a cake box or careful transportation logistics. I've transported these in a simple covered container for picnics, road trips, and potlucks, and they arrive looking almost as good as when they left my kitchen. The frosting also acts as a protective layer, keeping the bars from drying out over a day or two.
Flavor Combinations That Keep Evolving
These bars are a blank canvas once you master the base recipe, and I've found myself experimenting with small variations that shift the whole vibe. I've added a quarter cup of raisins for autumn gatherings, swapped in cardamom for a more sophisticated spice profile, and even tried a hint of orange zest one inspired afternoon.
- For a nut-free version, simply omit the walnuts and add an extra tablespoon of grated carrot to keep the moisture level balanced.
- If you want to make these ahead, bake them completely, frost them, and freeze them for up to two weeks—they thaw beautifully and taste almost fresher than freshly made.
- A sprinkle of toasted coconut on top of the frosting adds texture and a tropical note that surprises people in the best way.
 Save
Save These bars have become my answer to those moments when you want something that feels special but isn't pretentious about it. They're proof that you don't need complicated techniques to create something people will remember.
Recipe FAQs
- → Can I substitute nuts in the bars?
Yes, you can replace walnuts with pecans or omit nuts entirely for a nut-free option without compromising texture.
- → How do I achieve the marbled effect on top?
Dollop the remaining carrot batter over the cheesecake layer and gently swirl with a knife before baking.
- → What is the best way to store these bars?
Keep them refrigerated, tightly covered, for up to 5 days to maintain freshness and flavor.
- → Can I add extra ingredients for flavor?
Adding 1/4 cup raisins to the carrot batter enhances sweetness and texture nicely.
- → What tools are needed to prepare these bars?
An 8-inch square pan, mixing bowls, electric mixer or whisk, spatula, parchment paper, cooling rack, and a knife are essential.