 Save
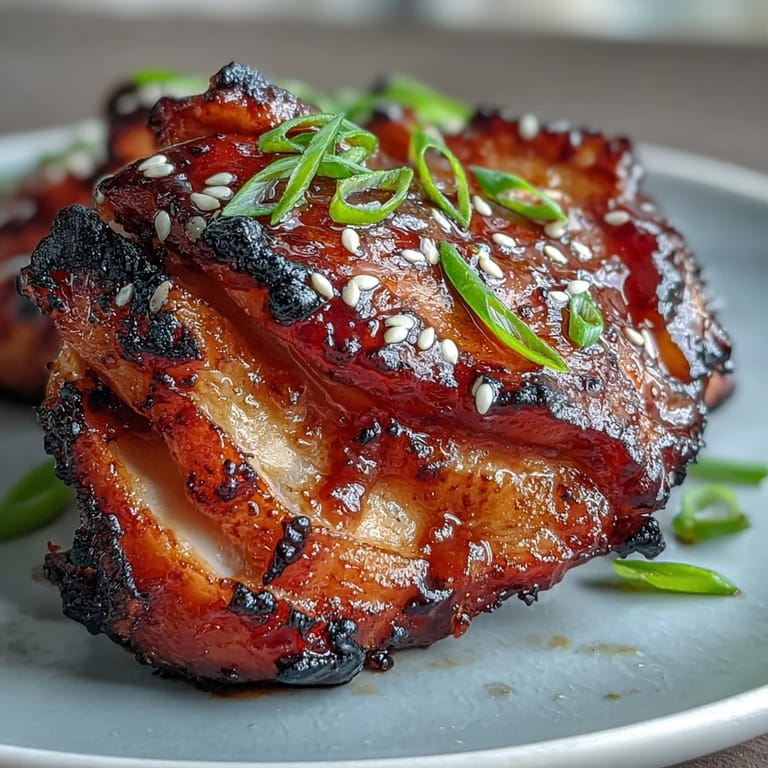
Save The first thing that hit me when I opened the oven door was the sharp, sweet tang of ginger and soy, rising in cloudy steam and promising a sticky reward. My headphones were playing an upbeat song, and I almost danced as I brushed the final layer of glaze onto the bubbling chicken thighs. There was something delightfully simple about turning just a few ingredients into a glossy, crave-worthy dinner—a process so rhythmic it felt almost meditative. Sometimes I cook to impress; other times, it’s simply to delight myself, and these soy glazed chicken thighs have a way of feeling like a personal treat. Maybe it was the sesame seeds scattered on top or the satisfying sizzle—either way, this dish became an evening mood lifter in my kitchen.
I once cooked these chicken thighs during a spontaneous weeknight gathering where two friends showed up unannounced, hungry and tired from work. There wasn’t much in the fridge, but as soon as the scent of roasted garlic and soy started wafting through the apartment, the entire energy shifted. We hovered by the oven, swapping bits of news, everyone helping to slice green onions or stir the glaze between laughs. By the time the chicken hit the table, we were all grinning and ready for seconds. These small moments—where good food brings people closer, almost by accident—are the ones I remember most.
Ingredients
- Chicken thighs: Bone-in, skin-on thighs keep the meat juicy and the skin turns irresistibly crisp under the glaze—always pat them dry for better browning.
- Soy sauce: The foundation of our glaze—experiment with low-sodium versions if you like, but the depth is essential.
- Honey: This adds a glossy sweetness and helps the glaze become perfectly sticky as it bakes.
- Rice vinegar: Just a splash balances the sweetness and salt, stopping the glaze from feeling heavy.
- Brown sugar: Melts into the sauce, giving it body and a mellow caramel undertone that pairs beautifully with soy.
- Sesame oil: The secret to a warm, nutty aroma that lingers as the chicken roasts.
- Garlic & ginger: Don’t skip either—they provide punchy flavor and make the kitchen smell amazing from the start.
- Cornstarch: Mixing it with water creates the glossy, thick finish on the glaze—no lumps if you whisk well.
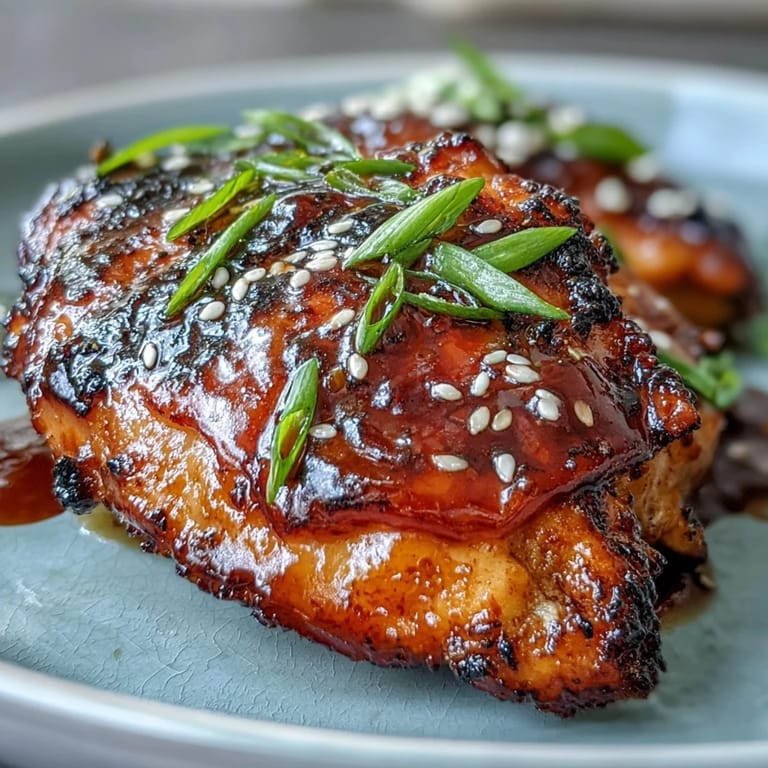
- Sesame seeds & green onions: Optional, but they add crunch and a touch of brightness for the perfect plate.
Tired of Takeout? 🥡
Get 10 meals you can make faster than delivery arrives. Seriously.
One email. No spam. Unsubscribe anytime.
Instructions
- Prep the oven and pan:
- Slide the oven rack to the center and crank the heat up to 400°F 200°C, then line your baking tray so cleanup stays easy.
- Ready the chicken:
- Pat each thigh dry—trust me, it's worth it—then season with salt and pepper, arranging skin side up so they crisp nicely.
- Make the glaze:
- Mince garlic, grate ginger, and toss both into a saucepan with soy sauce, honey, rice vinegar, brown sugar, and sesame oil—the mixture should bubble and smell delicious within a minute.
- Thicken the glaze:
- Stir the cornstarch and water together, pour the slurry into the saucepan, and keep stirring while it thickens and turns shiny.
- Brush and bake—round one:
- Liberally brush half the warm glaze over the chicken, letting it slip into every nook, then set the tray in the oven for the first bake.
- Second glaze and finish:
- After 25 minutes, take the chicken out carefully—it should be just starting to color—then brush the rest of the glaze over and return it for the final 10 minutes, watching for that deep caramel shine.
- Garnish and serve:
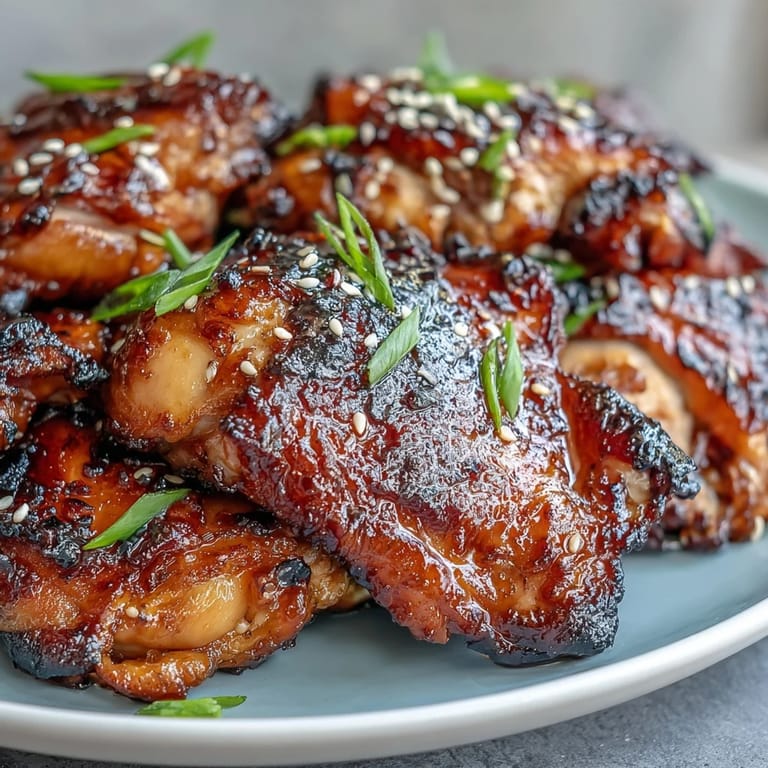
- Lift the chicken onto a platter, scatter with sesame seeds and green onions if you like, and serve immediately while everything's still sticky and hot.
 Save
Save There was a night I cooked this dish just for myself, standing barefoot at the counter in mismatched socks, eating sticky chicken straight from the tray with chopsticks. Something about licking sticky glaze from my fingers—no fancy plates, no company—made it feel like self-care rather than just dinner. These are the sort of evenings when food gives comfort beyond hunger. The kitchen was quiet except for the scrape of my fork, and I let the savory, sweet flavors linger a bit longer than usual. The chicken, glistening and golden, was better than any takeout.
When to Broil and Why It Matters
I quickly learned that broiling for a couple minutes at the end gives the glaze a delightful caramelized finish—just don’t wander away or you’ll end up with burnt sugar instead of a sticky crust. That short blast of high heat adds a little char and an unmistakable depth of flavor. Try it the first time and you’ll be hooked. If you’re nervous, watch through the oven window and pull the tray as soon as dark spots form. The transformation is worth every anxious peek.
Easy Customizations for Any Mood
One thing I love about these chicken thighs is how easily you can change the vibe: swap in a splash of sriracha for gentle heat or toss in lime zest if you crave extra zing. Sometimes I like to stir in a spoonful of miso for a richer umami hit, or add a sprinkle of chili flakes on top. If you’re feeding kids or spice-averse friends, the recipe is forgiving and adaptable. Just stick to the basic method and you can riff with confidence. You might even start to crave different versions depending on your mood or what’s hiding in the pantry.
What to Serve and How to Plate It
Steamed jasmine rice and sautéed bok choy are my go-to sides, but honestly, these chicken thighs would be just as happy alongside quinoa or a crisp cucumber salad. I sometimes serve everything family style, straight from the tray, so everyone can help themselves and drizzle the extra glaze over their portions. If you want a fancier look, arrange thighs atop a mound of rice and scatter sliced green onions like edible confetti. Cleanup stays blissfully simple if you stick to parchment paper or foil on the pan. The only real rule is to eat while it’s hot, when the skin crackles and the glaze is still sticky.
- Keep extra glaze warm to drizzle over rice or vegetables.
- Leftovers can be shredded for sandwiches or cold rice bowls.
- Remember to double the recipe if you want any for tomorrow’s lunch.
 Save
Save Sticky soy glazed chicken thighs are hard not to love, whether you're sharing them with friends or treating yourself. Happy cooking and don’t be surprised when everyone asks for the recipe.
Recipe FAQs
- → How do I achieve a sticky, caramelized skin?
Pat the thighs very dry and bake at a high temperature so the skin crisps. Brush the prepared glaze on halfway through cooking and once more before the final minutes. A short broil (2–3 minutes) at the end will deepen caramelization—watch closely to avoid burning.
- → Can I use boneless thighs or drumsticks instead?
Yes. Boneless thighs will cook faster—check for doneness earlier (reduce time by about 8–12 minutes). Drumsticks work well too but may need a slightly longer bake; adjust timing until the meat reaches the proper internal temperature and the glaze is sticky.
- → How do I thicken the soy glaze without altering flavor?
Make a small cornstarch slurry (1 tsp cornstarch + 1 tbsp water) and stir it into the simmering glaze. Let it cook 2–3 minutes until glossy and slightly thickened. Simmering also concentrates flavors without adding extra sweeteners.
- → What internal temperature indicates the chicken is done?
Cook until the thickest part of the thigh reaches about 175°F (80°C) for bone-in thighs. This ensures the dark meat is fully cooked and tender while allowing the skin to caramelize under the glaze.
- → How can I make this gluten-free?
Swap regular soy sauce for tamari or coconut aminos, and ensure any brown sugar or other condiments are certified gluten-free. The cooking technique and glazing steps remain the same.
- → What’s the best way to store and reheat leftovers?
Refrigerate cooled chicken in an airtight container for up to 3–4 days. Reheat in a 350°F oven to restore crispness and warm the glaze; a quick broil at the end can re-caramelize the skin. Microwave will warm faster but won’t keep the skin crisp.