 Save
Save I still remember the December afternoon when my grandmother pulled a gingerbread house frame from her oven, and I watched her work with such patience and precision. The kitchen smelled like spices and possibility, and I realized then that some of the most beautiful things we create in the kitchen aren't meant to be eaten immediately—they're meant to be admired, shared, and savored as edible art. This gingerbread house frame became my way of bringing that same magic to my own holiday table.
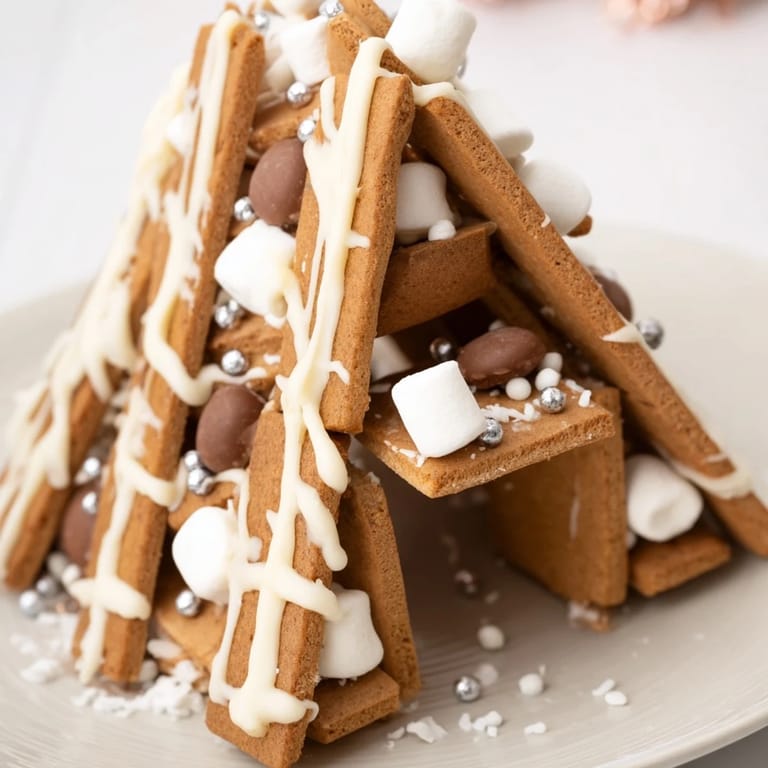
I'll never forget the year I made this for a small holiday gathering, and my best friend walked in, saw the gingerbread frame arranged on a platter with cookies peeking out from inside, and actually gasped. She said it looked like something from a fairy tale, and I realized in that moment that food isn't just about taste—it's about the memory you create when you put thoughtfulness into presentation.
Ingredients
- All-purpose flour (300 g): This is your foundation, and measuring it by weight rather than cups makes all the difference in consistency. I learned this the hard way after my first batch came out too cakey.
- Brown sugar (100 g): Use a good quality brown sugar—the deeper molasses notes give the gingerbread its rich, authentic flavor that white sugar just can't match.
- Unsalted butter (100 g), softened: Room temperature butter creams beautifully and creates that tender crumb. I keep mine on the counter for about an hour before baking.
- Molasses or dark honey (100 g): This is where the soul of gingerbread lives. Molasses gives deeper color and flavor; honey keeps things slightly lighter. Either works, but don't skip it.
- Large egg: This binds everything and gives structure to your panels so they hold their shape during assembly.
- Ground ginger (1 tsp): Fresh spice is crucial here. Old spices fade, so check your container and replace if it's been sitting more than a year.
- Ground cinnamon (1 tsp): The warm, familiar spice that makes everything smell like the holidays.
- Ground cloves (½ tsp): A small amount goes a long way—this is what gives gingerbread its distinctive, slightly peppery depth.
- Baking soda (½ tsp): This helps the dough rise just slightly and gives you those crisp edges that make assembly easier.
- Salt (¼ tsp): Even in sweet baking, salt amplifies flavor and keeps everything in balance.
- Egg white (1): For the royal icing—use it at room temperature for better volume when beating.
- Powdered sugar (200 g), sifted: Sift it before adding to avoid lumps that will ruin your smooth icing.
- Lemon juice (½ tsp): Just a whisper of acid that brightens the icing and helps it set properly.
- White chocolate (50 g), melted: Use good quality white chocolate—it drizzles more elegantly and tastes better than the waxy stuff.
- Assorted candies and decorations: White chocolate buttons, colored sprinkles, mini marshmallows—let your holiday spirit guide you here. This is where you make it your own.
Tired of Takeout? 🥡
Get 10 meals you can make faster than delivery arrives. Seriously.
One email. No spam. Unsubscribe anytime.
Instructions
- Cream the butter and sugar:
- In your mixing bowl, combine softened butter and brown sugar, beating until it's light, fluffy, and noticeably lighter in color than when you started. This usually takes about 3 minutes with an electric mixer. This step is where you're incorporating air, which makes your gingerbread tender rather than dense.
- Add the wet ingredients:
- Beat in the egg, then slowly pour in the molasses while mixing. The batter might look a bit loose at this point—that's perfectly normal. Scrape down the sides of the bowl to ensure everything is incorporated.
- Combine your dry ingredients:
- In a separate bowl, whisk together the flour, ground ginger, cinnamon, cloves, baking soda, and salt. Whisking distributes the spices evenly so you get consistent flavor throughout every piece of your house frame.
- Bring the dough together:
- Gradually add the dry mixture to the wet ingredients, stirring until everything just comes together into a smooth dough. Don't overmix—gingerbread dough doesn't need a lot of encouragement. Wrap it in plastic wrap and chill for at least 30 minutes. I often chill mine overnight, and it becomes easier to work with.
- Prepare your workspace:
- Preheat your oven to 180°C (350°F) and line a baking sheet with parchment paper. Lightly flour your work surface—gingerbread dough can stick if you're not careful.
- Roll and cut with confidence:
- On your floured surface, roll the dough to about 5 mm thickness—this is important because too thin and your panels will be fragile, too thick and they won't bake evenly. Using templates or a knife, carefully cut out your house panels: front, back, two sides, and roof pieces. Each panel should be roughly 10–12 cm. If you don't have templates, you can sketch them on cardboard and trace around them.
- Bake until just set:
- Place your pieces on the lined baking sheet and bake for 10–12 minutes. You're watching for the edges to become just firm while the centers are still slightly soft—they'll continue cooking a tiny bit as they cool. Pull them out too early and they'll be fragile; too late and they become brittle.
- Cool completely:
- Transfer the baked panels to a wire rack. This usually takes about 30 minutes. Don't try to assemble with warm pieces—they'll be too flexible and won't hold their shape.
- Make the royal icing:
- In a clean bowl, beat the egg white until soft peaks form, then gradually add the sifted powdered sugar a little at a time, beating between additions. Add the lemon juice near the end. You're aiming for a consistency that's thick and glossy but pipeable—like thick whipped cream. This is your edible glue.
- Assemble with patience:
- Pipe royal icing along the edges of your panels and carefully press them together. Hold each piece for a few moments until the icing begins to set. Work in a cool kitchen if possible—warmth makes icing softer. Once assembled, let the entire frame dry for at least 30 minutes. I sometimes leave mine overnight to ensure maximum stability.
- Decorate with joy:
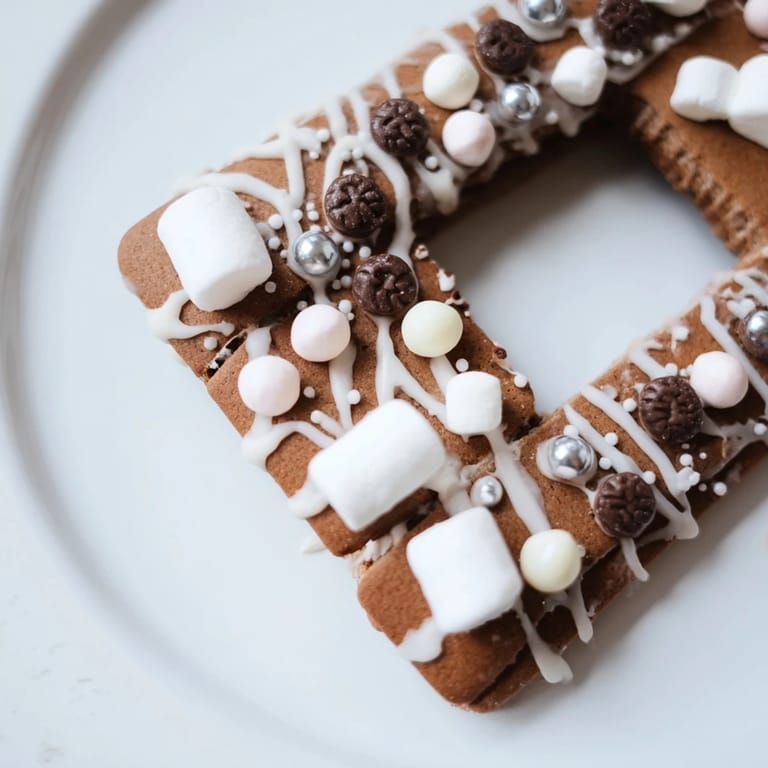
- Now comes the fun part. Drizzle melted white chocolate along the edges and corners, strategically place candies with small dots of royal icing, add sprinkles, marshmallows, whatever makes your heart happy. Dust with edible glitter if you're feeling fancy.
- Present your masterpiece:
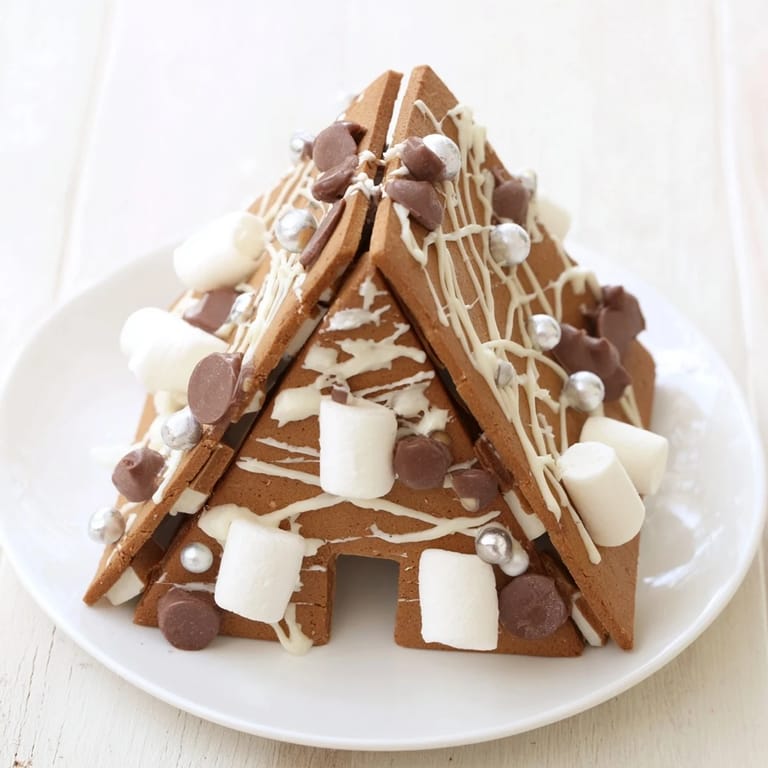
- Once everything is fully set, place your gingerbread frame on a platter and arrange additional cookies, festive treats, nuts, and decorations inside and around it. Step back and admire what you've created.
 Save
Save There was one year when my niece, who was six at the time, asked if she could help decorate the gingerbread frame. Her little hands carefully placed candies in patterns only she understood, and watching her transform an already beautiful creation into something entirely her own reminded me that this isn't really about perfection—it's about the love and intention you bake into every piece.
Making This Your Own
The beauty of this recipe is that it's a blank canvas for your creativity. I've experimented with adding a tablespoon of cocoa powder to the dough for deeper color, and it's stunning. Some years I add a touch of nutmeg for extra warmth, or swap the molasses for dark honey for a lighter, slightly different flavor profile. Your gingerbread house frame should reflect your taste and your holiday traditions.
Baking Smart
One trick I wish I'd known earlier: bake all your panels a full day ahead if you can. Store them airtight at room temperature, and they become even more stable for assembly. This also takes the pressure off—you can assemble and decorate whenever feels right, without worrying about fresh baked pieces being too delicate. The frame actually improves as the gingerbread sets and firms up overnight.
Making Memories at the Table
This gingerbread house frame has become my favorite way to turn dessert into an experience. Serve it alongside hot chocolate or mulled wine, and watch how people's faces light up when they see it. The cookies and treats you arrange inside become part of the edible display, and somehow everything tastes better when it's presented with this much care.
- Arrange your treats inside the frame in odd numbers—three different types of cookies, five kinds of candies—it's more visually interesting than even numbers.
- If you're baking ahead, fresh gingerbread panels stay crisp for about three days in an airtight container, so you don't need to rush to assemble.
- Remember that this frame is absolutely edible, so once the initial admiration passes, break it apart and enjoy every piece—nothing should go to waste.
 Save
Save Every time I make this gingerbread house frame, I'm transported back to those early kitchen moments with my grandmother, and I'm reminded that the most delicious part of any recipe is the care you put into it. I hope this becomes part of your holiday tradition too.
Recipe FAQs
- → What ingredients give the gingerbread its classic flavor?
The dough combines ground ginger, cinnamon, and cloves with molasses or dark honey to create its signature warm and aromatic taste.
- → How do I assemble the gingerbread house frame securely?
Use thick royal icing as a glue to attach panels, holding each piece briefly until set, then allow the structure to dry fully for sturdiness.
- → Can I prepare the dough in advance?
Yes, wrapping and chilling the dough for at least 30 minutes before rolling helps with handling; baking panels a day ahead enhances stability.
- → What decorations complement the frame best?
White chocolate drizzles, assorted white and brown candies, and optional edible glitter or silver pearls enhance the festive look.
- → Are there alternatives to royal icing for assembly?
For those avoiding eggs, vegan royal icing substitutes using plant-based ingredients can be used for decoration and assembly.
- → What tools are essential for creation?
Key tools include mixing bowls, a rolling pin, templates or a knife for cutting panels, a baking sheet with parchment, and a piping bag for icing.