 Save
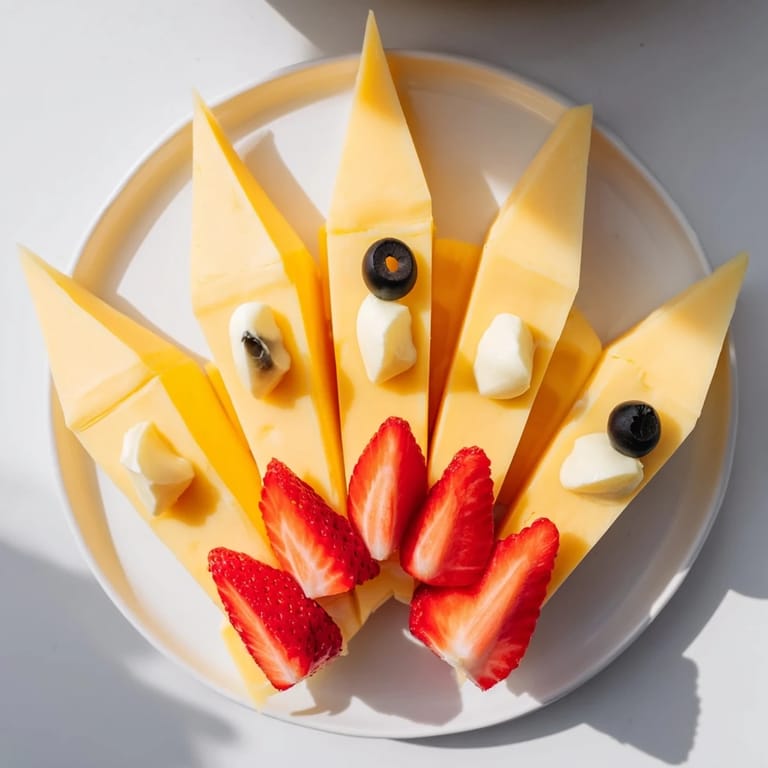
Save My nephew's face lit up the moment he saw the rocket platter I'd arranged on the kitchen counter. He hadn't even tasted anything yet, but the simple act of stacking those cheese wedges into a pointed shape had somehow turned an ordinary snack into an adventure. I realized that day how much fun food could be when you stopped taking it so seriously and just played with it.
I made this for my friend's daughter's birthday party, and watching the kids carefully pick the strawberry flames off the platter was the best part. One little girl announced that the rocket tasted like it was going to the moon, and somehow that made the sharp cheddar taste even better.
Ingredients
- Sharp cheddar cheese, 200g: Cut into pointed wedges—the sharpness is what makes this shine, and the wedge shape is essential for that sleek rocket silhouette.
- Cream cheese, 100g: This is your edible glue when those cheese wedges start sliding around; a tiny dab between pieces keeps everything standing tall.
- Fresh strawberries, 200g: Slice them lengthwise to get those dramatic flame-like strips that actually look like fire.
- Black olives, 1 tablespoon sliced: These become your porthole windows or rocket details—they add visual interest and a salty pop.
- Carrot sticks, 2-3 thin: Perfect for rocket fins, and they add a natural earthy color that balances the reds and oranges.
- Fresh mint leaves, 1 tablespoon: A whisper of green makes the whole thing look more intentional, though honestly it's just for looks.
Tired of Takeout? 🥡
Get 10 meals you can make faster than delivery arrives. Seriously.
One email. No spam. Unsubscribe anytime.
Instructions
- Build your rocket body:
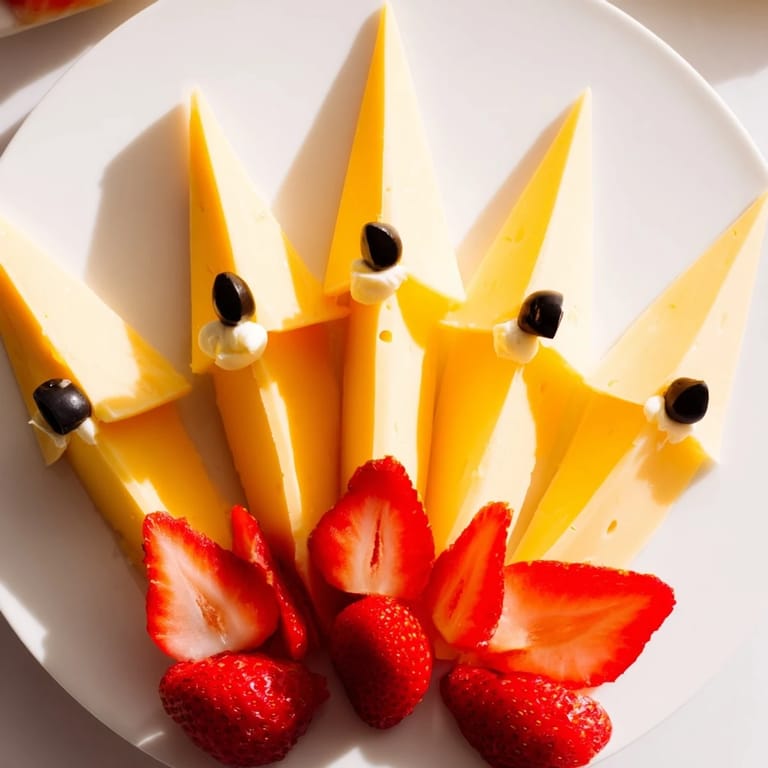
- Lay out those cheese wedges on your platter in a pointed formation, letting them overlap slightly like roof shingles. The angle matters—tilt them so they naturally create that rocket nose cone shape.
- Anchor everything with cream cheese:
- If things are feeling wobbly, use the smallest dabs of cream cheese between wedges as invisible support. It's like giving your structure a gentle hug.
- Create the flame effect:
- Fan those strawberry slices out from the rocket's base in an outward burst, like they're actually propelling it skyward. Overlap them just enough that they stay put but look dynamic.
- Add the details:
- Scatter olive slices along the rocket's body for windows or decorative portholes—let yourself have fun with placement.
- Dress it up with garnishes:
- Tuck carrot sticks along the sides for fins and scatter mint leaves around for color. This is where you make it feel special.
- Serve or refrigerate:
- Present it right away for maximum impact, or cover loosely and chill until party time.
 Save
Save There's something magical about serving food that makes people smile before they even take a bite. That's what this rocket does—it transforms a simple cheese and fruit platter into an experience.
Playing with Color Variations
Swap out the strawberries for mango or orange slices and suddenly you've got a different kind of flame—warmer, more citrusy, and visually distinct enough that people will think you made something completely new. I've also used Gouda for a deeper golden tone or Swiss for pale, elegant wheels. The shape stays the same, but the mood shifts entirely depending on what cheese and fruit you choose.
Making It a Heartier Offering
Set crackers or breadsticks alongside the rocket so people can build little cheese-and-fruit bites if they want something more substantial. It transforms this from a pure snack into something that could actually hold someone over between meals.
Serving and Storage Secrets
This platter is best assembled no more than a couple of hours before serving—the strawberries stay fresher and the cheese holds its shape better. If you're prepping ahead, keep the components separate in the fridge and assemble just before guests arrive for maximum visual impact.
- The rocket can sit at room temperature for up to an hour without any issues.
- If you make this the night before, keep everything refrigerated and let the cheese warm up for 20 minutes before arranging.
- Leftovers are just scattered components, so eat them within a day as separate snacks.
 Save
Save This recipe proved that the most impressive dishes aren't always the most complicated ones. Sometimes the magic is just in how you present what you have.
Recipe FAQs
- → How do I keep the cheese wedges stable?
Use small dabs of cream cheese as an edible adhesive between wedges to hold the rocket shape securely.
- → Can I substitute other fruits for strawberries?
Yes, mango or orange slices can replace strawberries to create different flame colors and effects.
- → What cheeses work well for this platter?
Sharp cheddar provides bold color and flavor, but Gouda or Swiss can be used for visual variety and taste.
- → How can I add decorative details to the rocket?
Sliced black olives serve as windows or accents, while carrot sticks and fresh mint leaves add fins and color highlights.
- → Is this platter suitable for vegetarians?
Yes, all ingredients are vegetarian-friendly and the dish is also gluten-free.